


This will allow your muscles and connective tissues to recover and repair, reducing the risk of strain and injury. It might be tempting to push through the discomfort, especially when you’re eager to see progress, but remember that rest is just as essential as the workouts themselves.
Proper Push-Up Technique: A Step-by-Step Guide
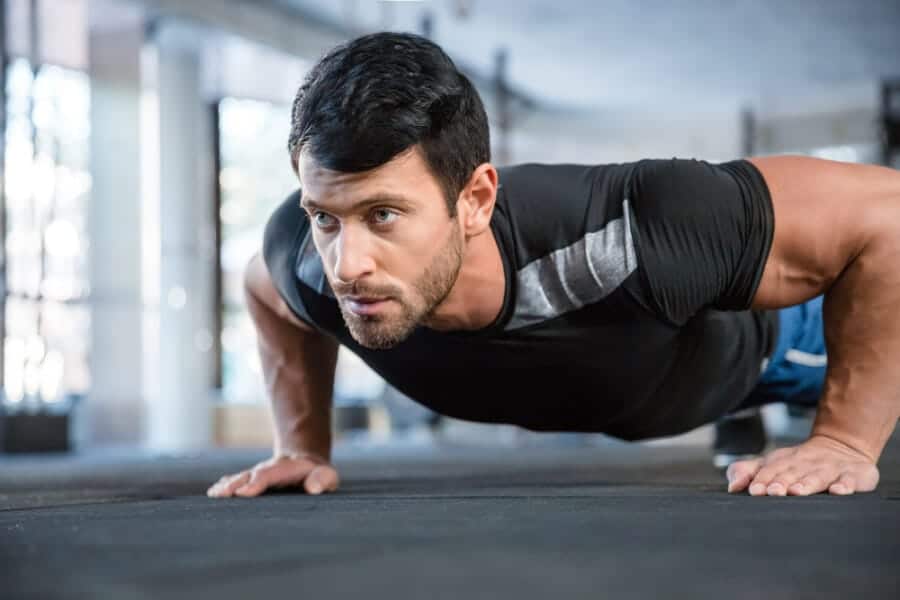
When it comes to push-ups, the proper technique can make all the difference. Here’s a quick refresher on how to ensure you’re doing push-ups correctly, according to Anuja J. Ghate, PT, DPT, from Replay PT in New York City:
- 1. Start Strong: Position yourself in a high plank, ensuring your hands are shoulder-width apart and your fingers are pointing forward. Your body should draw a straight line from head to heels—no sagging, please!
- 2. Lower Down with Control: As you move down, keep your head aligned with your spine. Bend your elbows and lower yourself until you’re just above the ground.
- 3. Elbow Placement Matters: Keep your elbows tucked at a 30- to 45-degree angle close to your body. This tweaks the stress away from your shoulder joint and lets your chest and triceps do more of the heavy lifting.
- 4. Go Low: Aim to lower down until your chest almost touches the floor (or whatever feels safe without compromising your form).
- 5. Push Back Up: Press through your palms to ascend back to your starting position while keeping that solid line from head to heels.
Recognizing Common Pitfalls in Push-Ups
Even the most dedicated fitness enthusiasts can fall prey to push-up pitfalls. Here are some common mistakes and how to sidestep them to keep your shoulders healthy:
Your Elbows Are Flaring
One major misstep is allowing your elbows to flare out more than 45 degrees from your body. This not only shifts the workload onto the shoulder joint but can also strain the surrounding muscles.
Solution: Keep those elbows angled closer to your side. Aim for 30 to 45 degrees, distributing the stress evenly across your chest and triceps and sparing your shoulders from undue strain.
Your Hand Position Isn’t Just Right
Did you know that the placement of your hands can significantly impact shoulder strain? If they’re too wide, you overwork the rotating muscles in your shoulders. If they’re too close, you risk putting stress on your shoulder tendons.
Solution: Position your hands just wider than shoulder-width apart, directly underneath your shoulders, with fingers pointed forward. This sweet spot stabilizes your shoulders while allowing for optimal muscle engagement.
Your Core Is Slacking
A push-up isn’t just an upper-body workout; it’s a full-body challenge. Not engaging your core can cause your lower back to sag, which inadvertently puts pressure on your shoulders.
Solution: Focus on engaging your core by pulling your belly button towards your spine. This helps keep your body in a straight line, distributing the workload appropriately through your core and reducing shoulder strain.
Your Shoulder Mobility Is Limited
If your shoulder mobility isn’t up to par, you might struggle to execute push-ups correctly, leading to discomfort or pain.
Solution: Prioritize shoulder mobility exercises at least two to three times a week. If you’re not sure where to start, consulting with a physical therapist can help tailor a plan that meets your individual needs.
Your Muscles Are Not Strong Enough
It may sound counterintuitive, but weakness in your shoulder-supporting muscles can lead to improper mechanics and overcompensating movements.
Solution: Boost the strength of your shoulder muscles with targeted exercises. Aim for two to three strength training sessions a week, keeping at least a day off in between for recovery.
You’re Pushing Too Hard, Too Often
Eager to crush your push-up goals? You might be tempted to do them daily. However, overdoing it can lead to irritation and potentially serious injuries.
Solution: Give yourself at least one day off between push-up sessions. This crucial recovery time lets your muscles bounce back, leaving you better prepared for your next workout.
By focusing on proper push-up technique, correcting common mistakes, and incorporating strength and mobility work, you can enjoy the benefits of this powerhouse exercise while minimizing your risk of shoulder pain. Remember, it’s not just about the number of push-ups you can do—it’s about doing them well. So, listen to your body, take those rest days, and keep striving toward your fitness goals. Your shoulders will thank you!When it comes to doing push-ups, the right technique and good form aren’t just about getting those extra reps; they’re crucial for preventing unwanted shoulder pain that can turn your fitness routine upside down. Taking intentional rest between sessions, as fitness expert Hribrick suggests, isn’t just a recommendation—it’s a smart strategy to help protect your shoulder health in the long run. Moreover, if you find yourself dealing with discomfort, incorporating specific exercises aimed at improving shoulder strength and mobility can make a world of difference.
Let’s dive into some targeted exercises that can help alleviate and even prevent push-up related shoulder pain. While the thought of adding more movements to your routine might feel a bit daunting, remember that each of these exercises is designed not only to strengthen your shoulders but also to enhance overall stability and improve your performance.
1. Arm Bar with Rotation
This straightforward exercise is fantastic for enhancing shoulder mobility while simultaneously stabilizing the shoulder joint.
- Get Started: Lay flat on your back, extending your left leg while bending your right leg, keeping your right foot planted on the ground.
- Hold Firm: Grasp a dumbbell or kettlebell with your right arm, pressing it over your chest with your palm facing your feet. Your left arm should stretch out beside you, palm down, in line with the shoulder.
- Engage the Movement: Elevate your right knee over your left leg and twist your chest to the left. Ground your right knee to the floor.
- Rotate Gently: Maintain pressure on the weight as you rotate your wrist in a clockwise direction and then back to counter-clockwise.
- Repeat: Aim for five rotations each way before switching arms, completing 2 to 3 sets in total.
2. Half-Kneeling Windmill
Once you’re comfortable with the arm bar, try this step-up exercise that further challenges your stability and strength.
- Begin Position: Get into a half-kneeling stance, your right leg in front. Hold a kettlebell or dumbbell in your right hand, pressed high above your head.
- Twist and Reach: With the weight overhead, shift your hips to the right, twisting your torso as you keep your gaze on the weight. Bring your left hand down toward the floor, ensuring it’s arm-straight and aligned with your shoulder.
- Return and Reset: Pull back to your starting position, pressing the weight overhead throughout.
- Repetitions: Repeat this movement for 2 to 3 sets of 5 to 8 reps on each arm.
3. Bear Shoulder Tap
This exercise focuses on the serratus anterior, which is vital for scapular stabilization and contributes to functional pushing motion.
- Start Strong: Position yourself in a tabletop pose, aligning your wrists with your shoulders and hips with your knees.
- Lift and Stabilize: Push your chest away from the floor, raising your knees slightly.
- Tap It Out: With control, tap your right shoulder with your left hand, then return it to the floor and switch to the opposite hand.
- Keep Steady: Maintain a solid base by keeping your knees close to the ground without swaying side to side.
- Repetition Goal: Aim for 10 shoulder taps on each side, and shoot for 2 to 3 sets.
4. Shoulder External Rotation at 90 Degrees
This banded movement strengthens your rotator cuff, which plays a key role in stabilizing your shoulder during lifts.
- Set the Scene: Attach a light resistance band to a low anchor point.
- Grip and Pull: Facing the anchor, grab the band with your left hand, pulling your elbow back to shoulder level.
- Position Your Arm: Bend at 90 degrees with your forearm parallel to the ground and palm facing down.
- Engage and Rotate: Step back until you feel tension in the band and then externally rotate your shoulder until your palm faces forward.
- Target Reps: Aim for 2 to 3 sets of 15 reps on each arm.
5. Seated Push-Up
This exercise will enhance your lat strength, crucial for shoulder stabilization during traditional push-ups.
- Sit Right: Begin seated on a bench, with a dumbbell beside each thigh.
- Grab and Lift: Take hold of the dumbbells. Raise your buttocks off the bench and draw your shoulders down, keeping your neck long.
- Hover Steadily: Using your upper body strength, hover above the bench while keeping your arms straight; hold this position for about 60 seconds, using your feet for support if needed.
- Sets to Focus On: Complete 2 to 3 sets.
When to Seek Professional Guidance
While there’s a lot you can do on your own to manage shoulder pain, there are times when you should consult a professional. If your shoulder discomfort lingers beyond a few days, becomes severe, or affects your daily routines, it’s time to reach out to a physical therapist. They specialize in evaluating and treating shoulder issues and can offer invaluable insights into the underlying causes of your pain.
By working with a physical therapist, you can undergo a thorough assessment of your technique, posture, movement patterns, and overall strength. This detailed evaluation not only helps pinpoint the root of your shoulder pain but also allows for a tailored treatment plan designed specifically for you.
Remember, caring for your shoulders isn’t just about avoiding pain; it’s about optimizing your performance and enjoying every workout to the fullest. So, embrace those rest days, focus on proper form, and incorporate these exercises into your routine—you’ll be thanking yourself later!
Image Source: Dean Drobot / Shutterstock